If you are tired of looking at the same dull, boring patio daily and want an upgraded version, but with less expenditure, you are at the right place.
Pea Gravel Patio Edging Ideas are the best way to spruce up your patio, without shelling out the extra bucks.
A structured edge provides a polished look to your patio while keeping the gravel in check.
In contrast with the traditional kind of landscaping, these edging ideas are easy to install, cost-effective, and can double up as a fun family project.
You can choose from these Pea Gravel Patio borders ideas as per your own taste, preference, and budget.
From metal borders to recycled glass, choosing the correct style for your patio can completely change how your patio looks and feels, giving it a more cohesive and inviting atmosphere.
In this guide, we will tell you all – what type of Pea Gravel patio edging style to use depending on your house type, how to take care of your pea gravel edging, and how much the installation costs me.
Aside from that, we’ll also go through some pros and cons to see whether you should go for a pea gravel patio edge or not.
So let’s begin, without any further ado…
What is a Pea Gravel patio, and why is it essential for outdoor spaces?
Pea Gravel consists of small, semi-rounded stones/pebbles, forming a practical, sustainable, and beautiful surface for your backyard.
These micro pebbles are ideal for patios, driveways, and even garden pathways, as they can naturally drain excess rainwater from the ground.
This pea gravel border around the house can become the most picturesque part.
Edging the Pea Gravel is necessary as the gravel spreads when not properly stacked – it spills all over your garden area, creating an unnecessary mess.
Installing an edge around the pea gravel will help to keep it in place while preventing it from overflowing into unwanted spaces.
A Pea Gravel Edge can give a textured look to your patio.
It will instantly transform your backyard, giving it a fresh look.
Furthermore, with low upkeep, it will be relatively easier to maintain, resulting in a more cost-effective strategy.
17 Stunning Pea Gravel Patio Edging Ideas to Transform Your Outdoor Space
You require a border to ensure that your patio comes together with your home and creates a complementary look.
But you cannot use just about any kind of edge for your home.
These 17 Pea Gravel Patio Edging Ideas can help you make an informed decision while helping you paint a picture of how your patio will look.
An Elegant Steel Edge for a Minimal Look
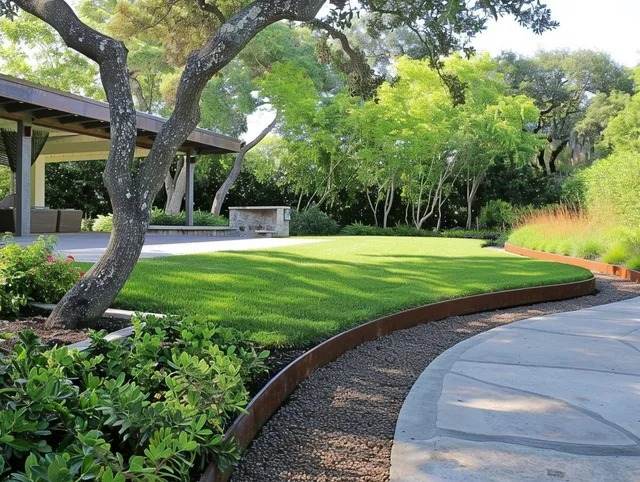
For an uncomplicated, minimal look, we recommend you go for a steel edge.
This provides a highly sophisticated, low-maintenance appearance to your patio with a smooth, sharp finish.
This style is more suitable for modern residences, simple gardens.
For a more structured look, pair it with succulents and beige-toned woven armchairs.
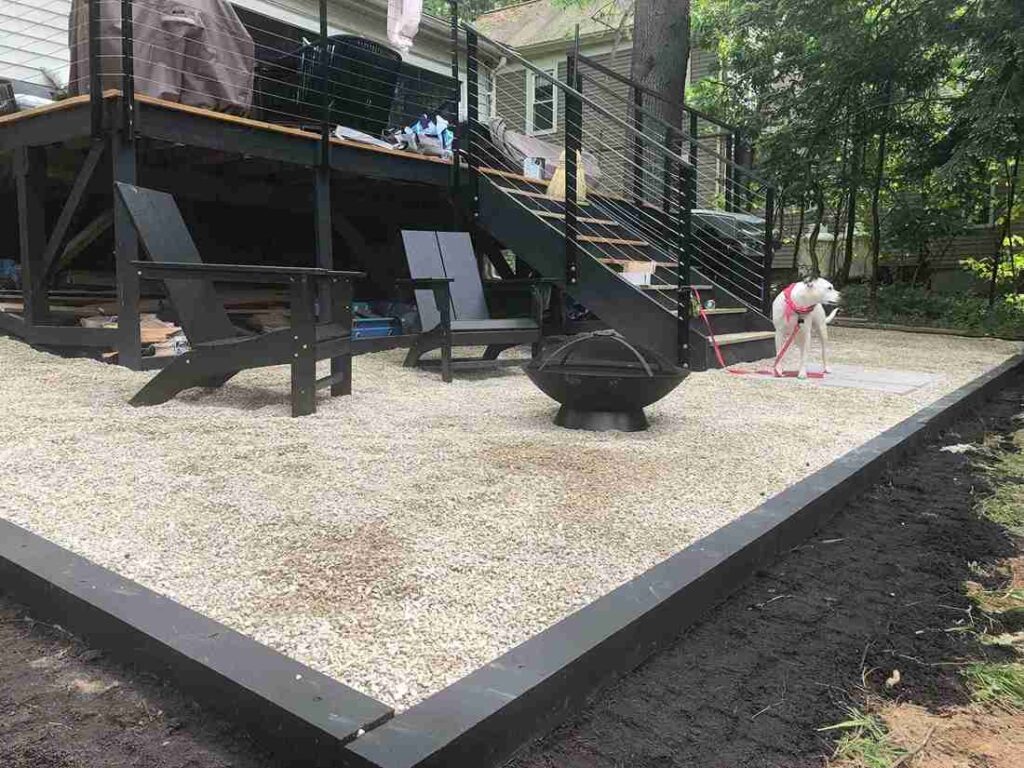
Metal Edge Designs for a Luxury Landscape
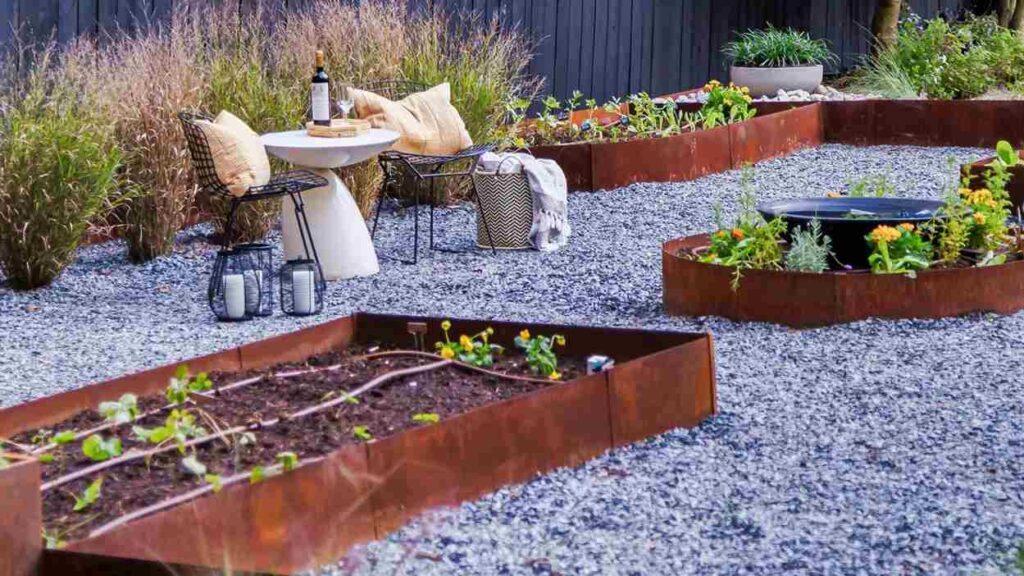
Metal Edges for pea gravel, especially aluminium borders, are considered to be one of the best ways to contain the pea gravel.
Owing to the metal’s ability to withstand harsher weather conditions and not rusting over time quickly.
To create a contrasting and simple look, we recommend you use small, light colored stones with dark borders.
This provides a very luxurious look without spending an exorbitant amount of money.
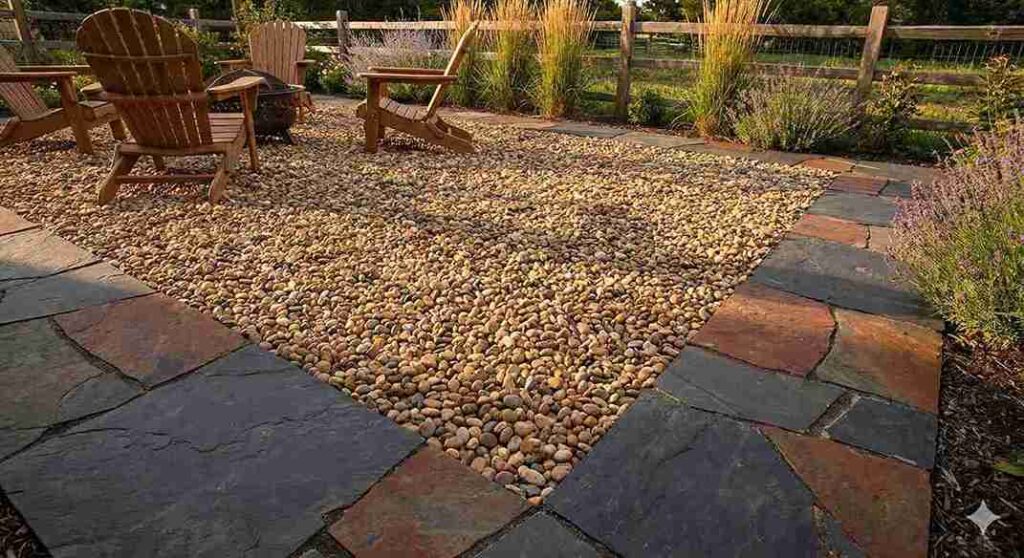
Crushed Gravel Edge for a Quirky Look
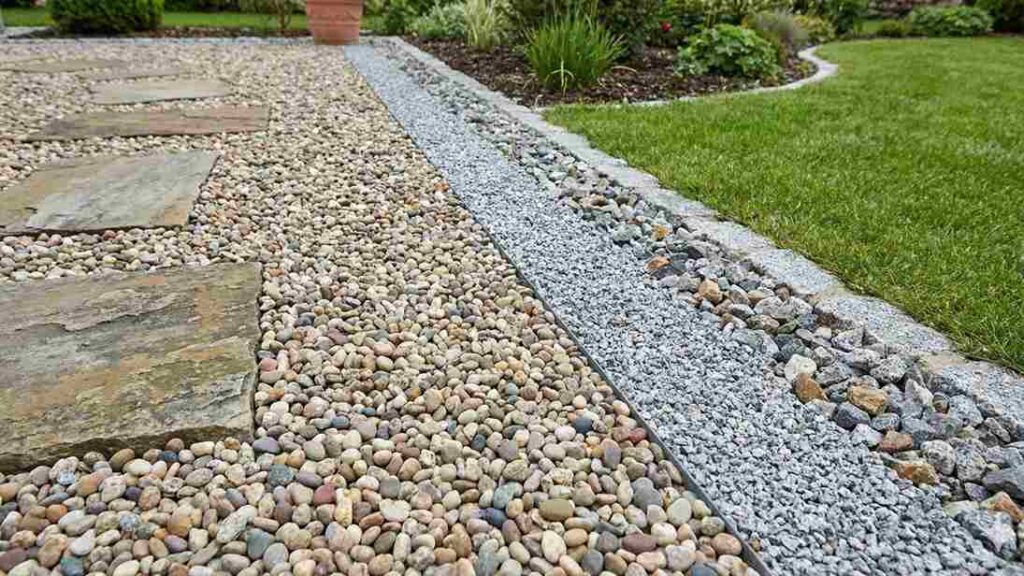
For a unique and quirky edge, first outline the patio with larger stones, and then fill it with the smaller pea gravel.
This provides a very countryside and homely feel to the patio.
If you want to take it a step further, we recommend pairing it with furniture that has broad, wide legs to avoid sinking or falling – lightweight outdoor sofas, bean bags add a boho-chic yet quirky look to the patio with this type of edging.
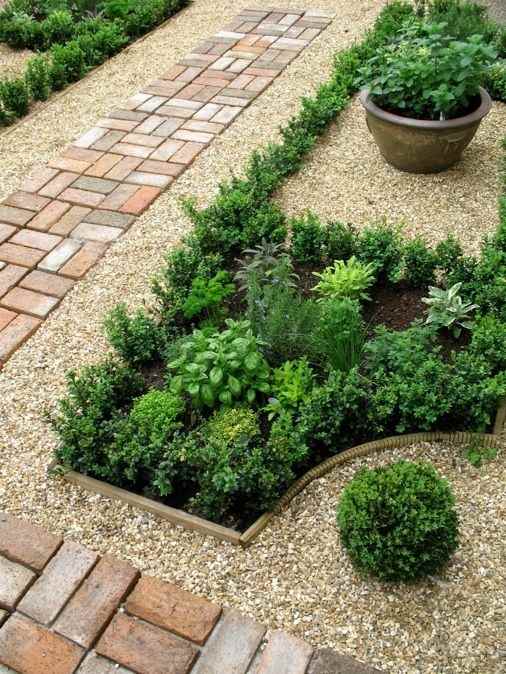
Classic Brick and Paver Edge for a Cozy Look

If an everlasting, cottage look is what you are going for, that screams ‘Hansel & Gretel’, then a classic brick and paver edge for your patio it is.
Nothing captures the charm of a cottage garden as well than a pair of red bricks laid flat or upright.
If you are feeling to kick it up a notch, you can mix and match different colors, contrasting red with white to enhance the ‘cozy’ feel.
This results in a neat border that also ends up giving the ‘fairytale-esque’ appearance to your patio.
Pebble Mosaic Edge for the Inner Artist
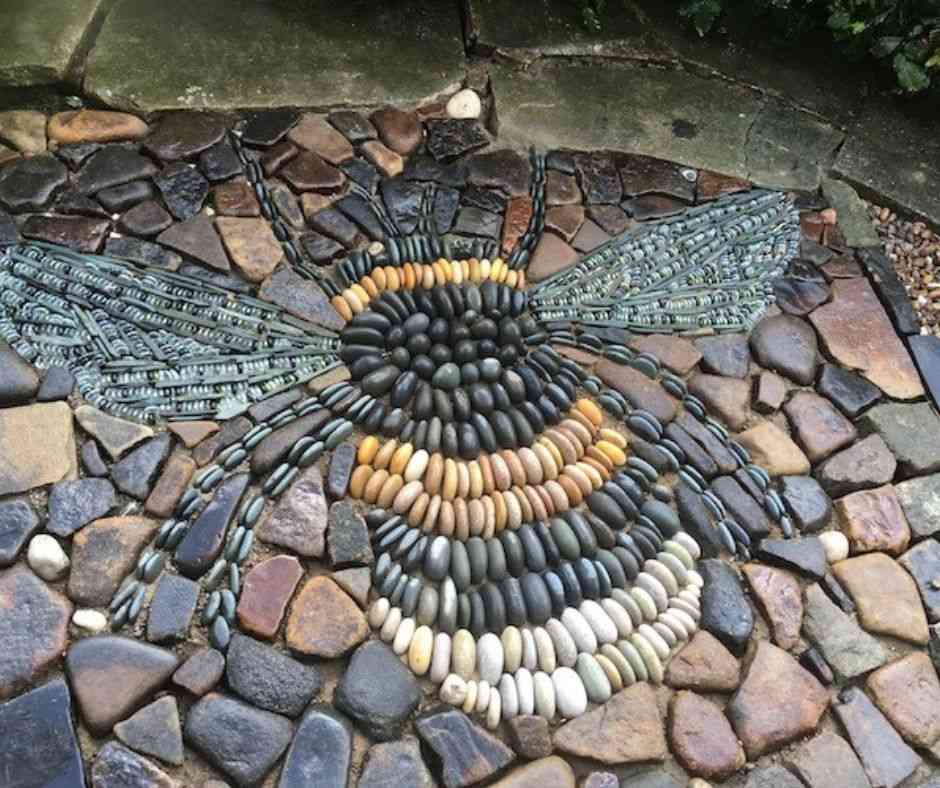
To satisfy the moody, inner artist, we suggest you go for the pebble mosaic style.
This perfectly sums up the moody, brooding part of you.
Throw in colored pebbles along your patio to form simple, concentric circles.
You can also use colored glass in the middle for an extra touch. Pair this style with chunky, wooden furniture to form a vintage look.
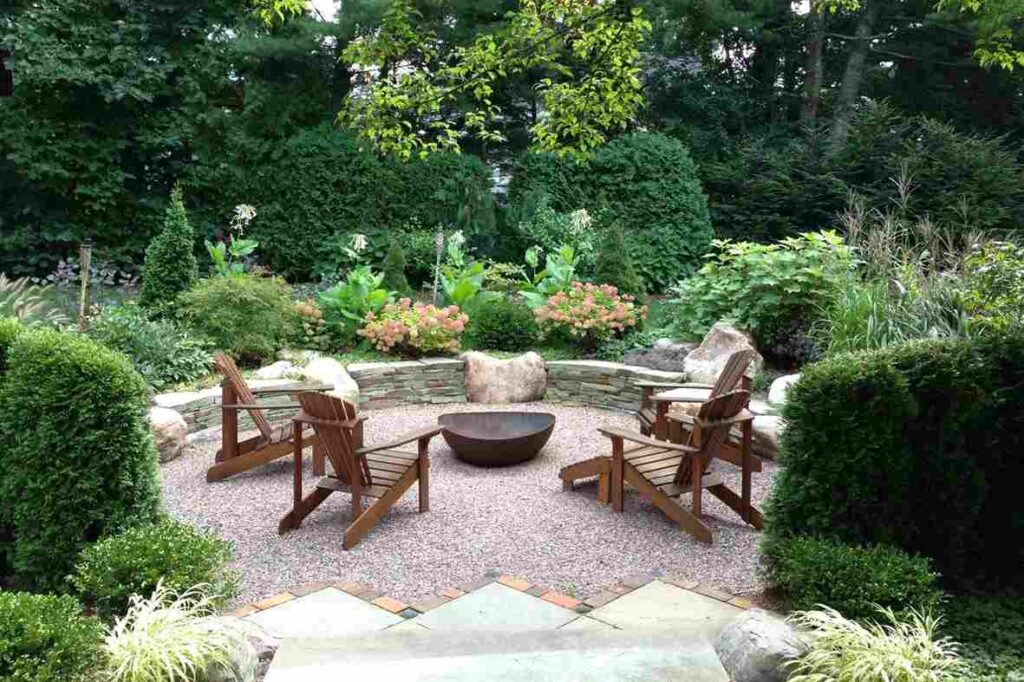
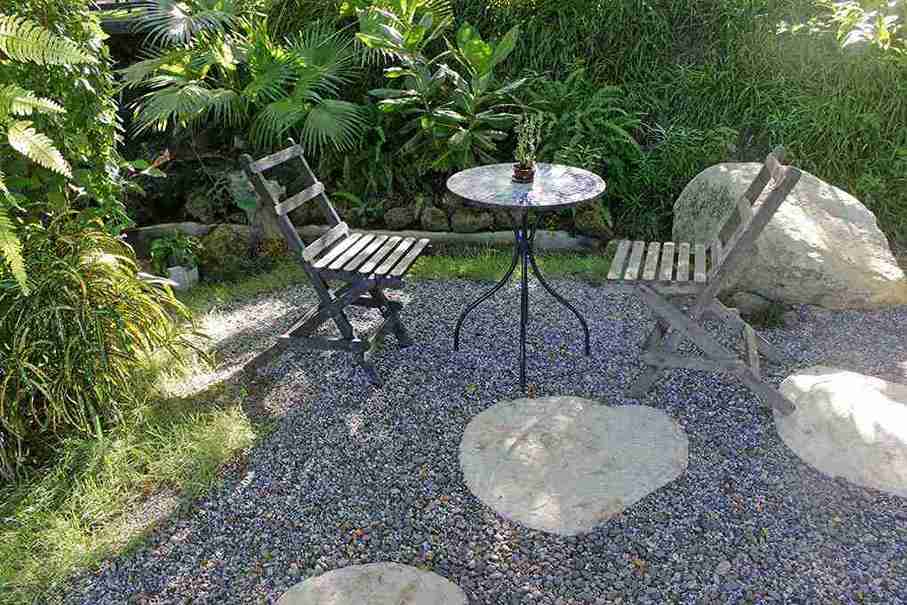
Weathered Stone Edge for a Character Rich Patio
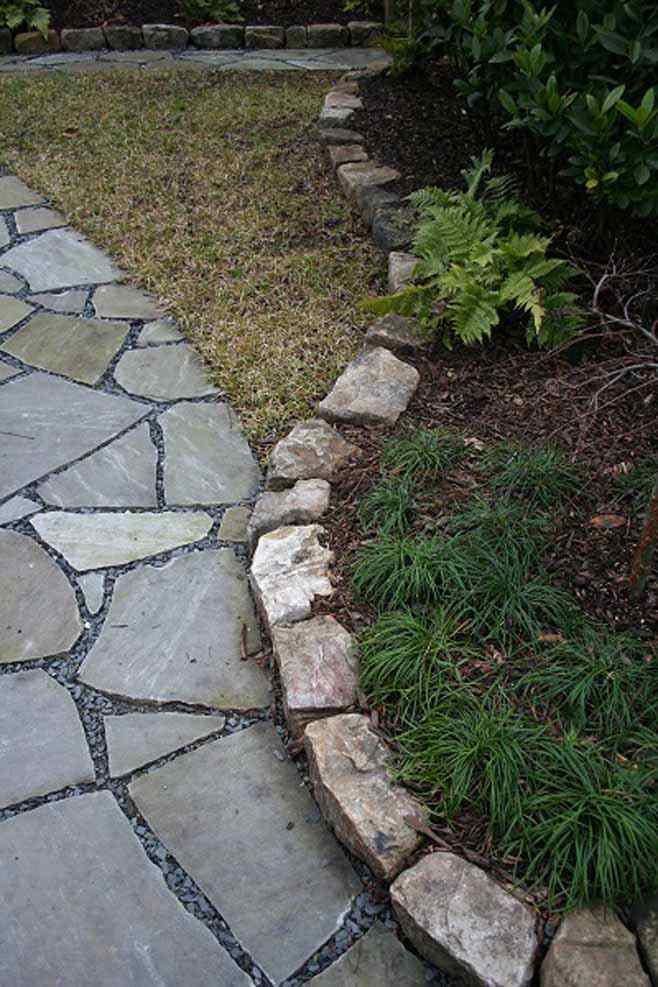
A weathered stone edge provides depth, character to your pea gravel patio.
The texture will give your backyard a space that is grounded, yet scenic.
Pair it with warm lighting, woven rugs, and thrifted wooden furniture, and you’ll have your own version of a rustic, lived-in vibe.
This combination will elevate your entire patio with fewer elements.
Reclaimed Wood Edge for a Heritage-Inspired Patio
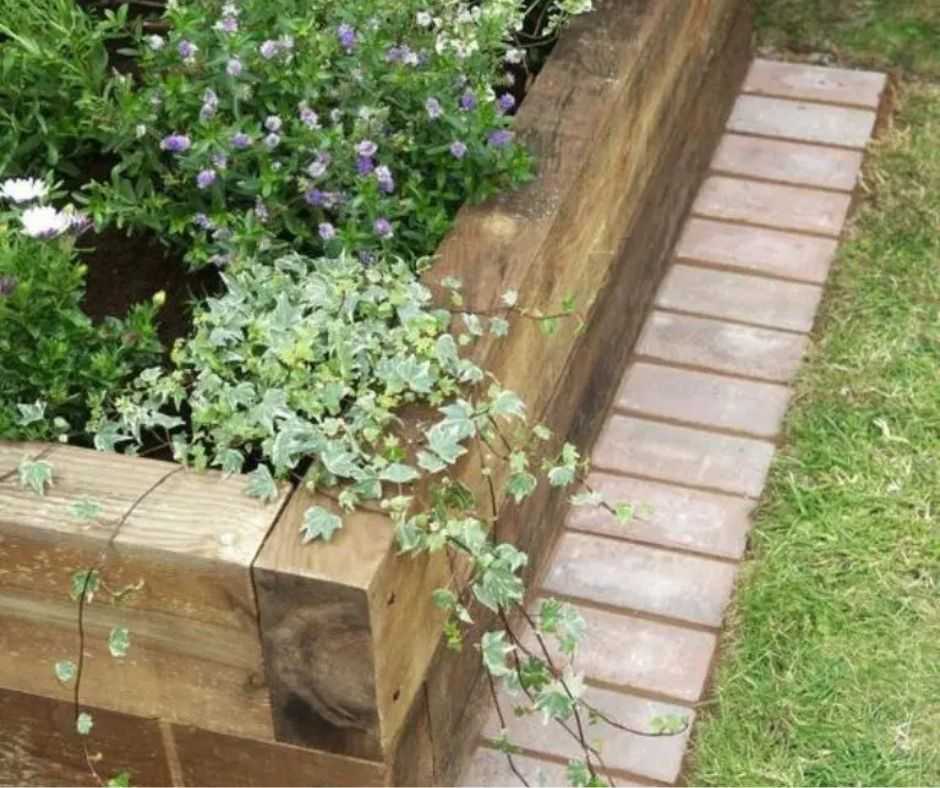
One of the most cost-effective ways to build your pea gravel patio is to use a reclaimed wood edge.
Its natural texture will give a very heritage-esque look to your patio.
For an elevated, homely take, pair this style of patio with old-school rattan-style armchairs, hanging lanterns.
This adds its own charm to it.
The main thing is its maintenance; if it’s left untreated, it’s likely to decay or lose its charm.
To avoid frequent replacements, it’s best that you maintain it from time to time.
Lush Living Plant Edge for a Refreshing Pea Gravel Patio

Plant Edges provide an eco-friendly look to your pea gravel patio.
Low-growing plants like moss, creeping jenny are easier to plant and unify the entire patio with your home.
They create a lush, flowy effect with their yellow-green tones, which can be paired beautifully with wooden benches, giving you a mini-park kind of feel in your patio.
Wrought Iron Edge for an Old Hollywood Look
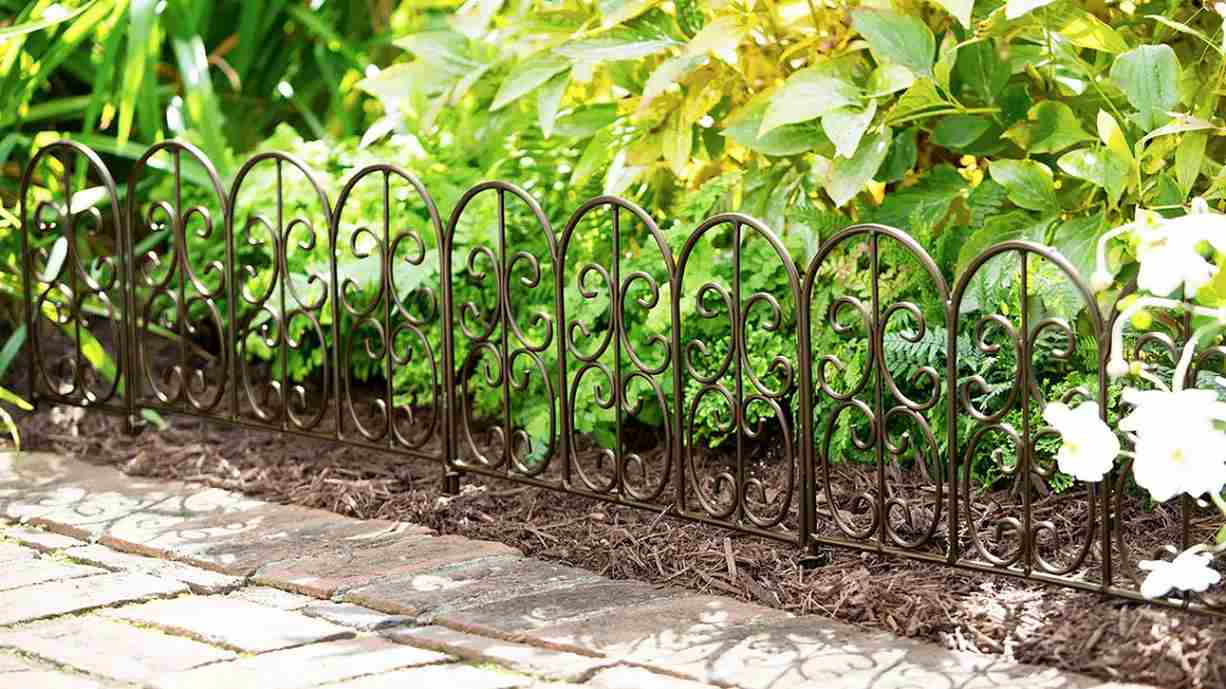
Wrought Iron is one of my favourites.
It gives off a very 1950s Hollywood vibe – old school palaces, with such wrought iron gates.
Automatically adding on a mysterious charm that you might like if you’re into that kinda aesthetic.
Now, just place those mystical elements in your patio using these edges.
These borders boast of history, artistry, and bring about a distinctive element to your pea gravel patio.
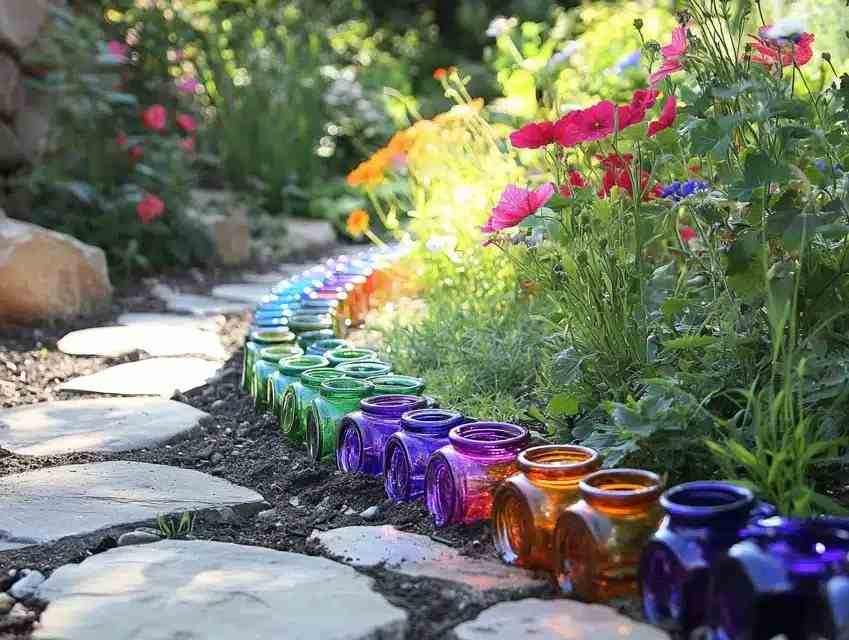
Recycled Glass Bottle Edge for a Whimsical Element

No need to throw away those finished wine bottles.
Just get their necks cut off, and plant them upside down in the ground to create a beautiful, finished look.
You can also place them into the ground without removing their necks.
Bonus point – If you pair different colours together, it will give off a unique look that’s eco-friendly and saves a hell lot of money.
Plus, it’s a great recycling activity to do with your family, just make sure everyone is wearing protective gear to avoid mishaps.
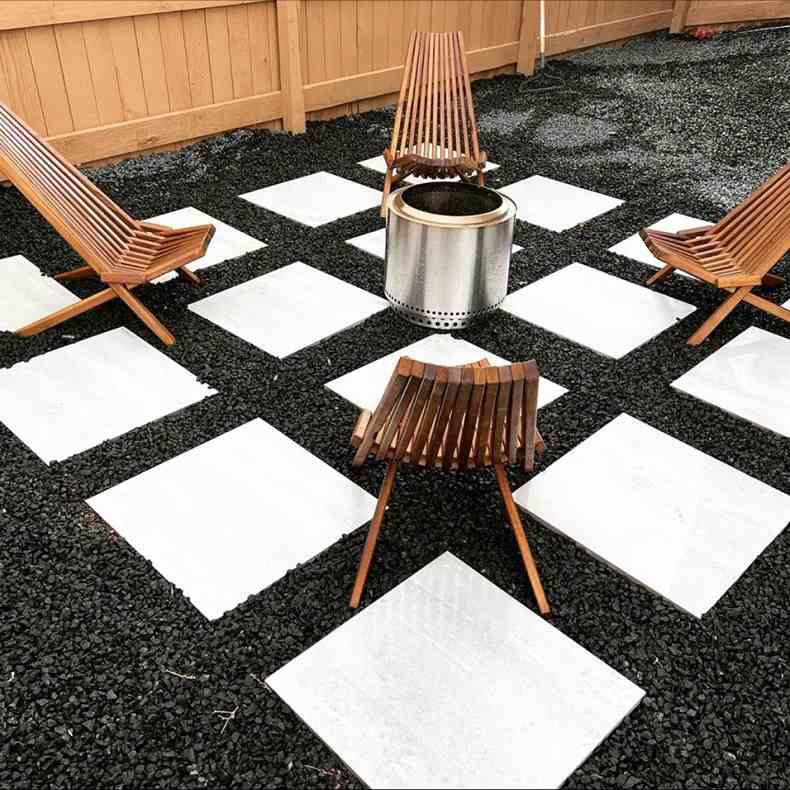
Concrete Edge for an Urbane, Classy Look
Concrete Edges give a functional, permanent look to your patio.
Being low-maintenance, they are highly durable and easier to install.
To create a more unified look, use black, sleek metal furniture to sit on top of the concrete slabs.
Bamboo Shoots Edge for a Spa-Like Ambience
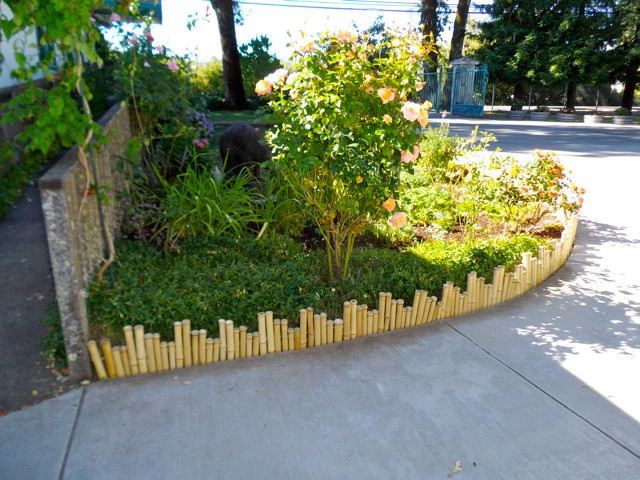
If you want a Spa-like environment without spending a lot of money, simply plant horizontal bamboo shoots along the patio.
It will instantly lift up your mood and give a fusion-style look to your home.
I saw this at a relative’s place and was intrigued by this version.
Slate Tiles Edge for an Earthy Effect

Slate Tiles give a very earthy look to your patio, as they are made up of natural stone.
These stones have earthy colors like gray, blue, etc, and are extremely durable with easy maintenance.
Slate tiles are very eye-catching, and they give a very curated look to your patio.
Terracotta Border Edge for a Rustic Charm
Terracotta orange hues give an earthly, warm look to the patio.
Combine succulents, warm cushions, with flat terracotta tiles to create a “Mediterranean” feel.
Such warm borders create an inviting space for friends and family that feels perennial, relaxed, and full of character.
Herb Garden Edge for a Functional Green Border
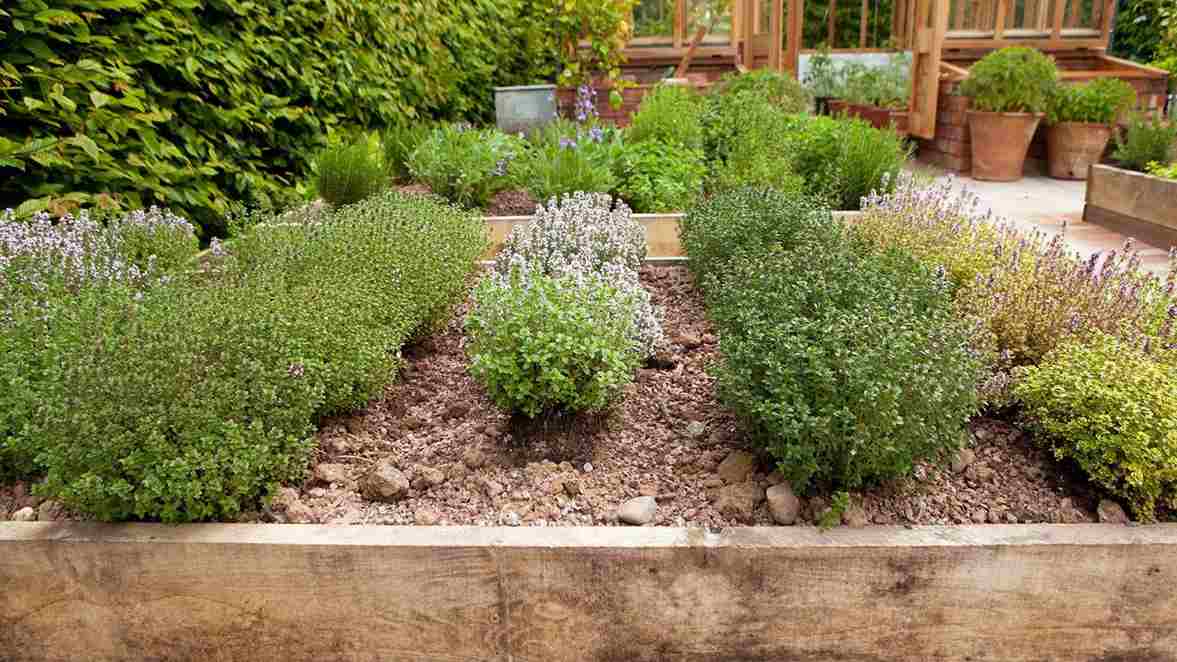
Another version of the Living Plant style is the Herb Garden Edge.
Plant herbs like Rosemary, Thyme, and Basil along the patio, and it can quickly elevate it like a mini backyard garden.
I love to cook in my backyard, so having this mini-garden on my patio has really helped me during those barbecue afternoons with family and friends.
Glass Block Edge for a Sophisticated Upgrade

Glass Block Edge provides a very civilised, cultured look to your patio.
Since glass can be durable, it is the perfect item for outdoor elements.
If you think glass block edges may not look good, then just picture this – due to its reflective properties, you can take advantage of the play of light from the sun, which creates a beautiful prismatic, rainbow effect on the pea gravel.
Gabion Wall Edge for a Textured Finish
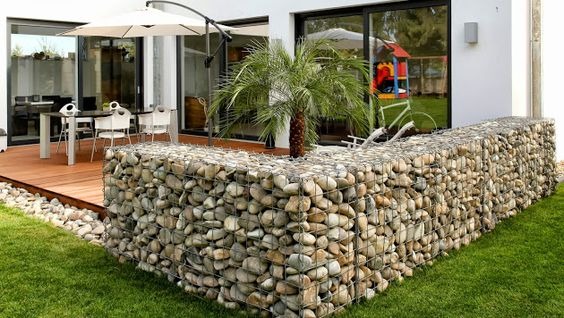
Gabion Walls are cage-like enclosures consisting of materials like stones, bricks, or broken pieces of concrete.
So these types of edges are more suitable for houses that are built on riverbanks, beaches, etc, due to their main use in structural engineering in protecting the shorelines from erosion.
Such styles can last longer as they are extremely sturdy and also provide a textured aesthetic to the homes.
How do you install cost-effective DIY pea gravel edging?
My partner and I had been arguing regarding the installation of the Pea Gravel Patio Edge – they wanted to hire some professionals to get the job done, while I was more focused on the DIY aspect of it (too much free time, eh?).
Anyway, I personally feel that DIY-ing the whole process is far better than outsourcing this.
You have full control over the whole project; you will have your own set of trials and errors while using the materials.
You will also have total control over the money spent, and finally, you will also have the final result in front of you as per your wishes.
However, if you have some time to spare, I highly recommend going the DIY route.
With the correct materials, tools, and this step-by-step breakdown, you can easily transfigure the backyard and achieve the patio of your dreams.
Step 1: Mark the area for your Pea Gravel Patio Edge
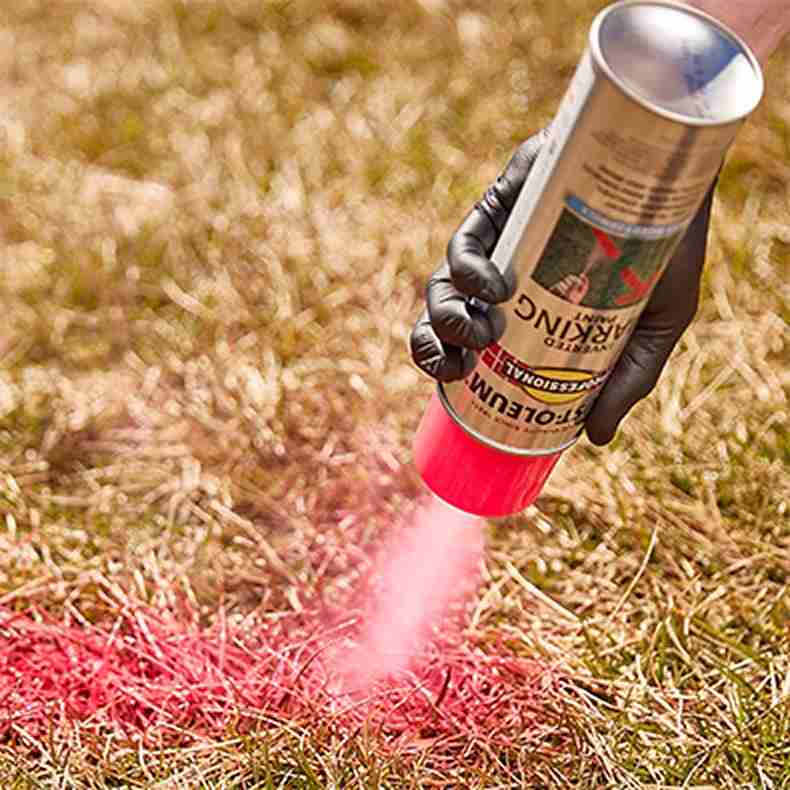
This is a very important step in building your pea gravel patio edge.
Be mindful of the geography as well, as the soil underneath also plays a major role in installing the pea gravel edge.
For example, if you live in North Carolina, the soil there is mostly clay, so you will need to wet the ground properly, remove the grass as well, and then place the pea gravel.
You can use your existing landscape as well for the outline, as it will save a ton of time for you.
However, if you have a big backyard, and you only want to use some portion of it as an edge, I would highly recommend that you map out the outline using a line-marking paint, which allows you to easily spray lines while holding the can upside down.
Step 2: Excavate the path shape and remove the grass
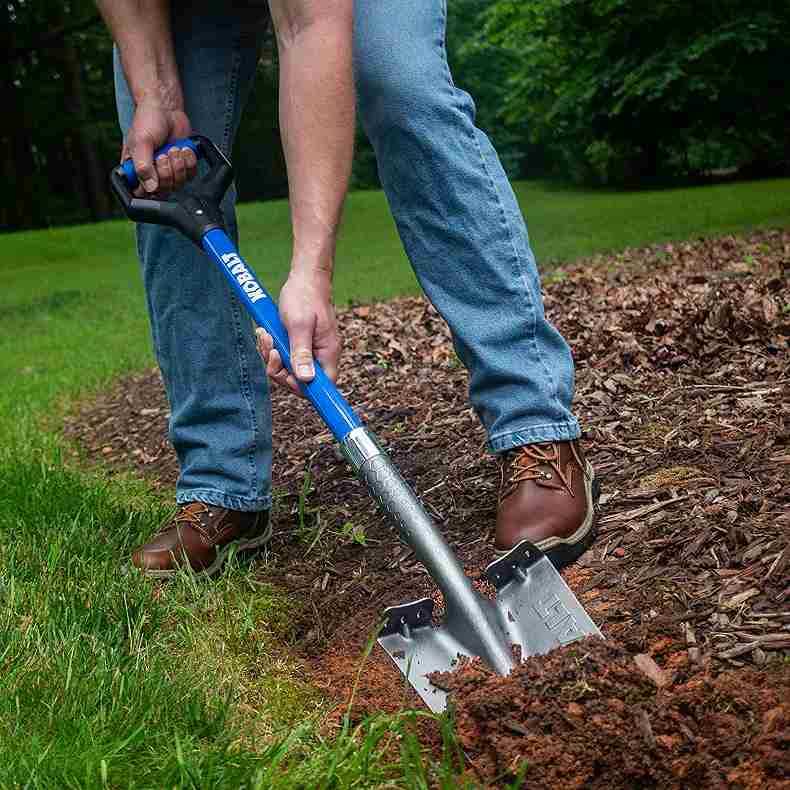
Once you have marked the outline, it’s time to start digging the outline.
Using a square-edged spade, remove the soil within the shape to a depth of 2 – 4 inches.
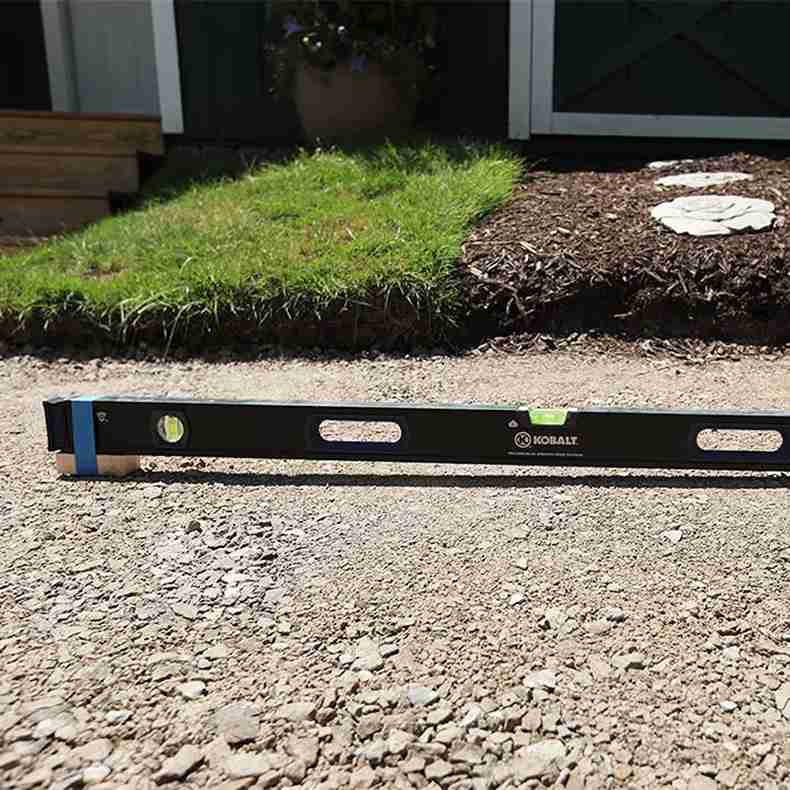
Always remember to keep checking if the level has gone too deep or not.
This step helps give the patio edge a definition, and you can properly visualise the patio style.
Tip: To ensure that the path shape comes out the way it should, place some furniture 2-3 feet around it to see if there is space for you and other people to move around.
This will also help you understand if you are going in the correct direction or not.
Now, it’s time to finally start removing the grass inside the perimeter in manageable sections.
Place them in a wheelbarrow for easy removal.
Step 3: Rake and Prepare the Base Soil
The outline is done, the grass is removed, and now let us head on to the next step – removal of any leftover rocks/stones from the ground.
Simply use a garden rake and run it over the freshly exposed soil. You can also use these stones later on as a final touch for the pea gravel, to give it a layered look.
Remember one thing – the more levelled and compressed the base, the easier it will be for you to settle the pea gravel.
I had to work a little extra on making my ground surface smoother because I knew I wanted to plant my herbs for the edge.
Step 4: Place the Landscape Fabric
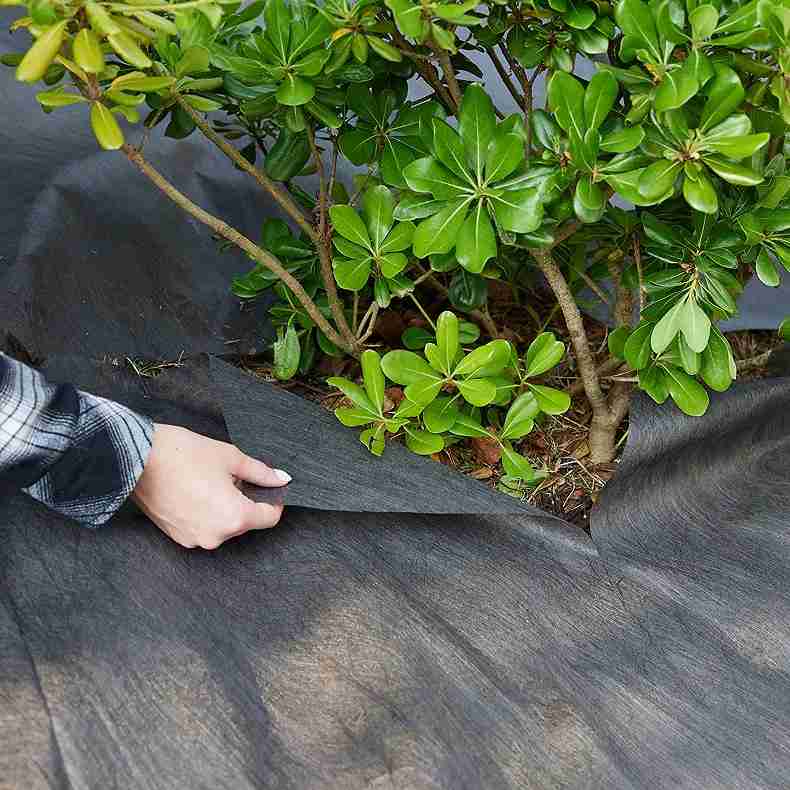
The landscape fabric is essential for weed removal, and also ensures the pea gravel sticks in place.
Place the fabric on top of the excavated area.
This creates a clear barrier between the base soil and the base stone layer.
Tightly secure the fabric all over the soil so that no amount of pea gravel can escape, by placing some big rocks on the corners.
This is just to steady the fabric correctly.
The landscape fabric will create a barrier for the weeds to grow, and will also help in drainage during the rains.
Step 5: Place the Base Stone Layer
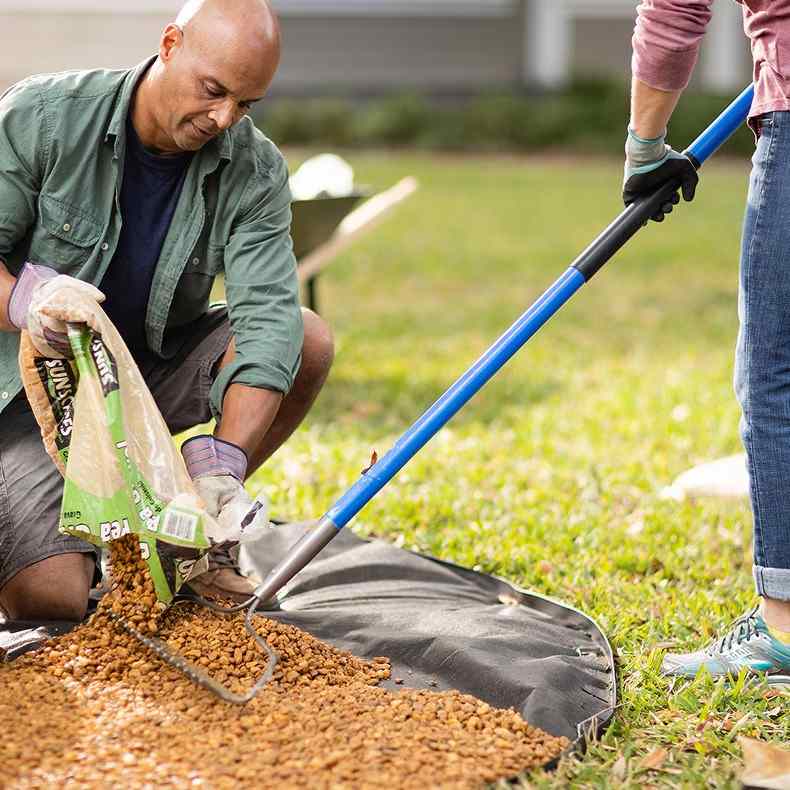
This is also a very important step before adding your pea gravel.
Trust me, had I not done this, my patio edge would have looked like a Stone Age mess!
Throw in a layer of crushed stone – ensure that the stone sizes are neither too big nor too tiny – on the fabric.
You can also use some decomposed granite, but that’s up to you.
Think of this layer as the blueprint – without it, the pea gravel will flow everywhere.
Once that is done, rake it out again.
We need to ensure that the surface level has to be even, otherwise the pea gravel won’t stick properly.
Step 6: Add the Pea Gravel Layer
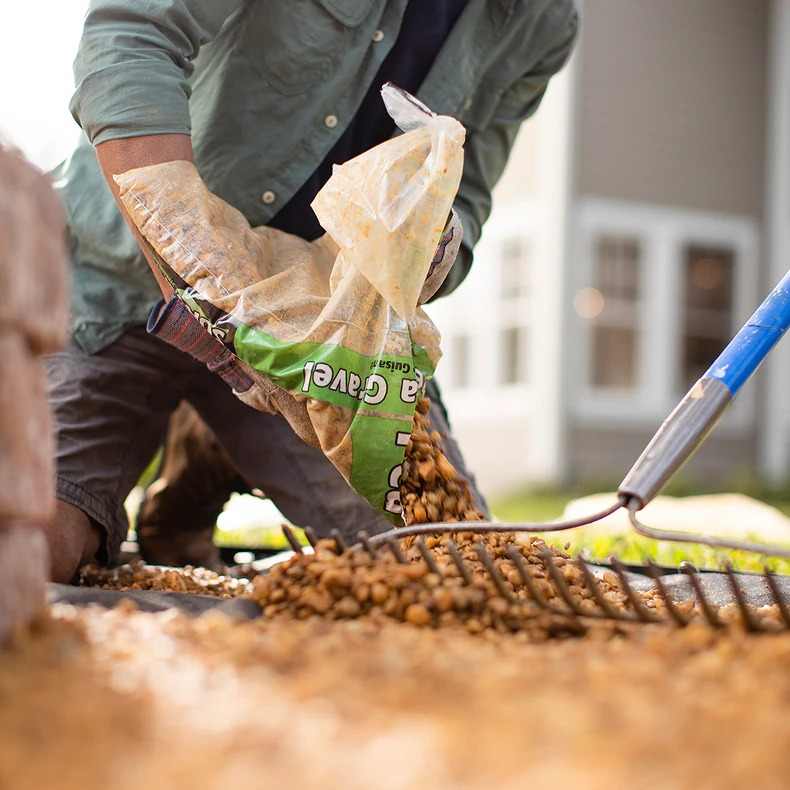
Now that the base stone layer is done, add 2-3 inches of pea gravel on top of it and compact it down using a shovel.
We discovered that the ideal stone size for the pea gravel should be between 4 – 10 mm.
The best part of the pea gravel is that since it comes in a variety of sizes, colors, etc, you can play around with it as much as possible.
Pro Tip: It is recommended to rake in the pea gravel properly after it is spread and compacted.
An evenly distributed layer looks pleasing to the eyes and is also really functional to maintain.
Step 7: Plant Your Herbs and other succulents along the edges
Since I wanted my patio edge to have herbs growing, I planted rosemary, thyme, mint, and other such herbs along the edges.
You can also plant some succulents alongside them, as they give off a very beautiful back garden feel.
Step 8: Compress the pea gravel and finish decorating the Patio
Before you start decorating the patio, do what I did – I walked barefoot on the pea gravel to check if it hurts my feet or not.
To my surprise, it didn’t hurt much. On the contrary, felt as if I was rubbing some pumice stone on my soles.
All things aside, this final touch gives the patio a very polished look.
All you need to do is walk over the pea gravel to see how it feels and if any spots are missed.
If everything feels good, then just quickly run a rake over the pea gravel and then compress everything again just to smoothen the surface.
What are the best maintenance practices for pea gravel edges?
As I mentioned above, Pea Gravel is relatively easier to maintain as compared to cement or any other material.
But with little upkeep, patience, your pea gravel patio can last longer.
- Regularly sweep the pea gravel to ensure that the surface remains smooth and there are fewer leaves. Use a leaf blower if you don’t want to use a broom; it’s far more useful.
- To refresh the pea gravel, add a new layer every 2-3 years, so that the drainage is in check. Save some of the original pea gravel as well; it will help you in doing the touch-up more easily. Plus, you will know what kind to buy if you ever run out of the original one.
- For better drainage, ensure to build the patio a couple of inches away from the main house. This will help in less erosion and a less soggy mess.
- Every two months, do a deep clean for the pea gravel with warm water and a mild dishwashing liquid soap. Rinse the area too thoroughly with the same solution and remove any remaining debris.
- Every season brings its own set of maintenance problems: Autumn comes with a ton of leaves, and Winter with frozen ground, snow, and weeds. For winter, avoid putting salt on the gravel as it can corrode the stones and make it harder to walk. For Autumn, clear the leaves using a leaf blower. Now, Spring comes with the ground thawing, fallen twigs, etc. Rake the patio to remove the debris, leaves, and weeds for cleaning.
What are the Pros & Cons of Pea Gravel Patio Edging?
Installing a Pea Gravel Patio Edge is relatively easier, and with simple but consistent maintenance, it will last longer in your backyard without losing it’s charm.
While I have mentioned some basic pros for the pea gravel, it also comes with its fair share of downsides.
It is equally important to mention them so that you can make an informed decision about whether to use the pea gravel or not.
| PROS | CONS |
| The entire DIY project just consists of a couple of materials and tools. Also, the cost of pea gravel per sq ft is between 7 – 10 $ as compared to concrete, which is between 15 – 20$. | If you haven’t properly installed the pea gravel correctly, it can become a home for weed growth. If your landscape barrier is weak or not laid properly, it will be very difficult for you to remove the weeds. |
| Pea Gravel has a very aesthetic appeal to it. So, if like me, you are a photo junkie, be prepared for your camera gallery to be completely full, because you won’t stop clicking pictures of your patio edges. Pea Gravel does not trap any moisture or water on the surface. Due to its size, it is perfect for drainage, as water goes through the ground. That’s also a big plus in the winters. | Some people (like my sister) may not like the way it feels when barefoot. Also, be a little careful when wearing heels and walking on the pea gravel, as they might get stuck. Speaking from experience, it does get a bit irritating. Additionally, furniture can wobble or sink in if not placed correctly. |
| Because of its stone size, pea gravel is extremely versatile and durable. A lot of my relatives and friends use pea gravel for their driveways. It can withstand harsh weather conditions (minus an earthquake, obviously!), like heavy rainfall, without destroying the patio quality. | Again, if not compacted and held properly, pea gravel can scatter easily, and you might need to rake the surface during regular intervals to remove the leaves and other debris. |
Conclusion
We have covered all the necessary things in this guide, consisting of Pea Gravel Patio Edging ideas.
Learned what is pea gravel, how to install a pea gravel patio edge, and went through its pros and cons.
We know that a well-designed, functional pea gravel patio edge will not only keep the stones in check, but it will also elevate your backyard.
I have also given you 17 pea gravel patio edging ideas.
From classic, metal edges, to Mediterranean-style, stone edges.
If you want you can try to mix up two different styles together as well for a complete new look. Something like – mosaic-patterned edges with tiny garden lanterns sitting atop.
Sounds cute and cozy, right? You can try mixing plants with herbs too if you’re aiming to create your own kitchen garden just like I did for my patio.
Additionally, do remember that all of these styles and ideas require consistent upkeep.
So keep at it, don’t forget to sweep the patio regularly, and you will have a pea gravel border around house that will last longer and also increase the value of your property.
Now that you have all the information at hand with you, what are you waiting for?
Choose the style that suits your patio best, gather all the materials, and dig away!
Keep the budget, upkeep & style in mind and say hello to a beautiful pea gravel patio edge that will last longer.